Preparing court exhibits is one of the most time-consuming and detail-sensitive responsibilities in litigation. A single mislabeled exhibit, missing page, or incorrect exhibit number can create delays, frustrate attorneys, or even result in evidence being rejected.
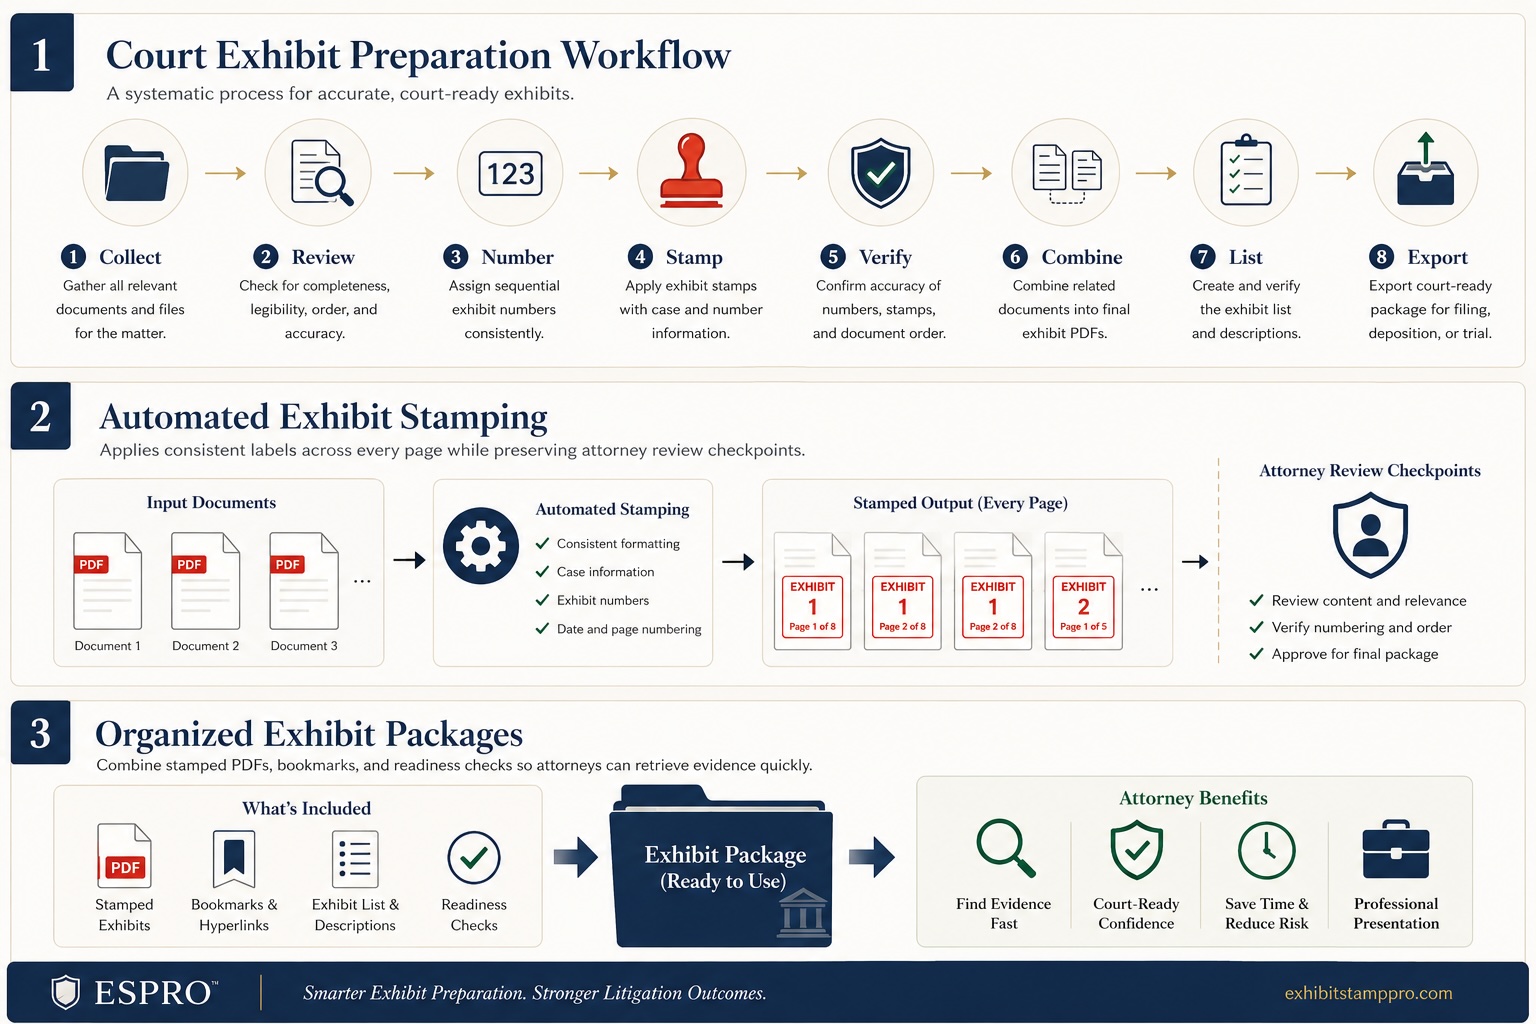
This guide explains the complete exhibit preparation workflow used by litigation professionals — from collecting documents to producing final PDF exhibit packages.
What you'll learn
By the end of this guide you'll know how to:
- ✓ Organize exhibit documents efficiently
- ✓ Apply consistent exhibit numbering
- ✓ Avoid common preparation mistakes
- ✓ Build court-ready PDF exhibit packages
- ✓ Decide when automation may save time
This guide is written for litigation paralegals, legal assistants, litigation support specialists, junior associates, and trial preparation teams.
What is a court exhibit?
A court exhibit is a document, photograph, email, contract, invoice, medical record, video, or any other piece of evidence presented during litigation.
Exhibits are commonly used in:
- Depositions
- Motions
- Hearings
- Arbitration
- Mediation
- Trial
Every exhibit must be clearly identified, properly numbered, and formatted according to court or attorney requirements.
Why exhibit preparation matters
Exhibit preparation is not simply administrative work.
Poorly prepared exhibits can result in:
- Incorrect exhibit numbering
- Missing documents
- Duplicate exhibits
- Broken PDF bookmarks
- Incorrect page orientation
- Missing exhibit labels
- Confusion during depositions
- Delays during trial
Because litigation often involves hundreds — or even thousands — of exhibits, accuracy becomes just as important as speed.
Step 1 — Collect all potential exhibits
The first stage is gathering every document that could become evidence.
Common sources include:
- Emails
- Contracts
- Medical records
- Photographs
- Expert reports
- Financial records
- Text messages
- Discovery responses
- Police reports
- Business records
Many litigation teams maintain exhibits inside dedicated case folders before preparing final exhibit sets. For a broader intake framework, see /resources/complete-guide-legal-exhibit-preparation.
Step 2 — Review and organize documents
Before assigning exhibit numbers, review every document carefully.
Questions to ask include:
- Is this the final version?
- Are pages complete?
- Are any pages upside down?
- Is every page legible?
- Are duplicate documents present?
- Does every exhibit belong in this matter?
Good organization at this stage prevents costly mistakes later. Teams handling high volumes should also review /resources/organize-large-exhibit-packages for structure that scales.
Step 3 — Assign exhibit numbers
Each exhibit receives a unique identifier.
Examples include:
- Exhibit 1, Exhibit 2, Exhibit 3
or
- Plaintiff Exhibit 101
- Defendant Exhibit A
- Trial Exhibit 500
The numbering convention depends on:
- Court rules
- Attorney preference
- Local practice
- Case complexity
Consistency is critical throughout the case. For deeper guidance, see /resources/best-practices-exhibit-numbering and /exhibit-numbering-software.
Step 4 — Stamp every exhibit
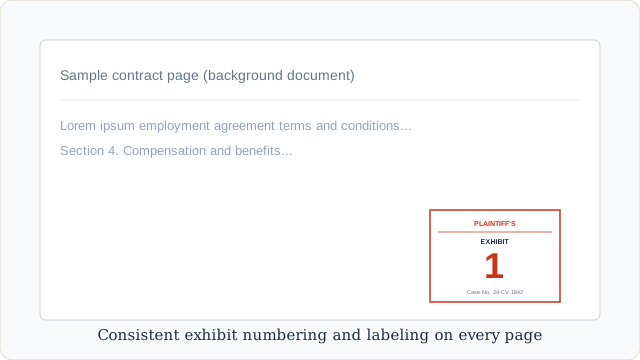
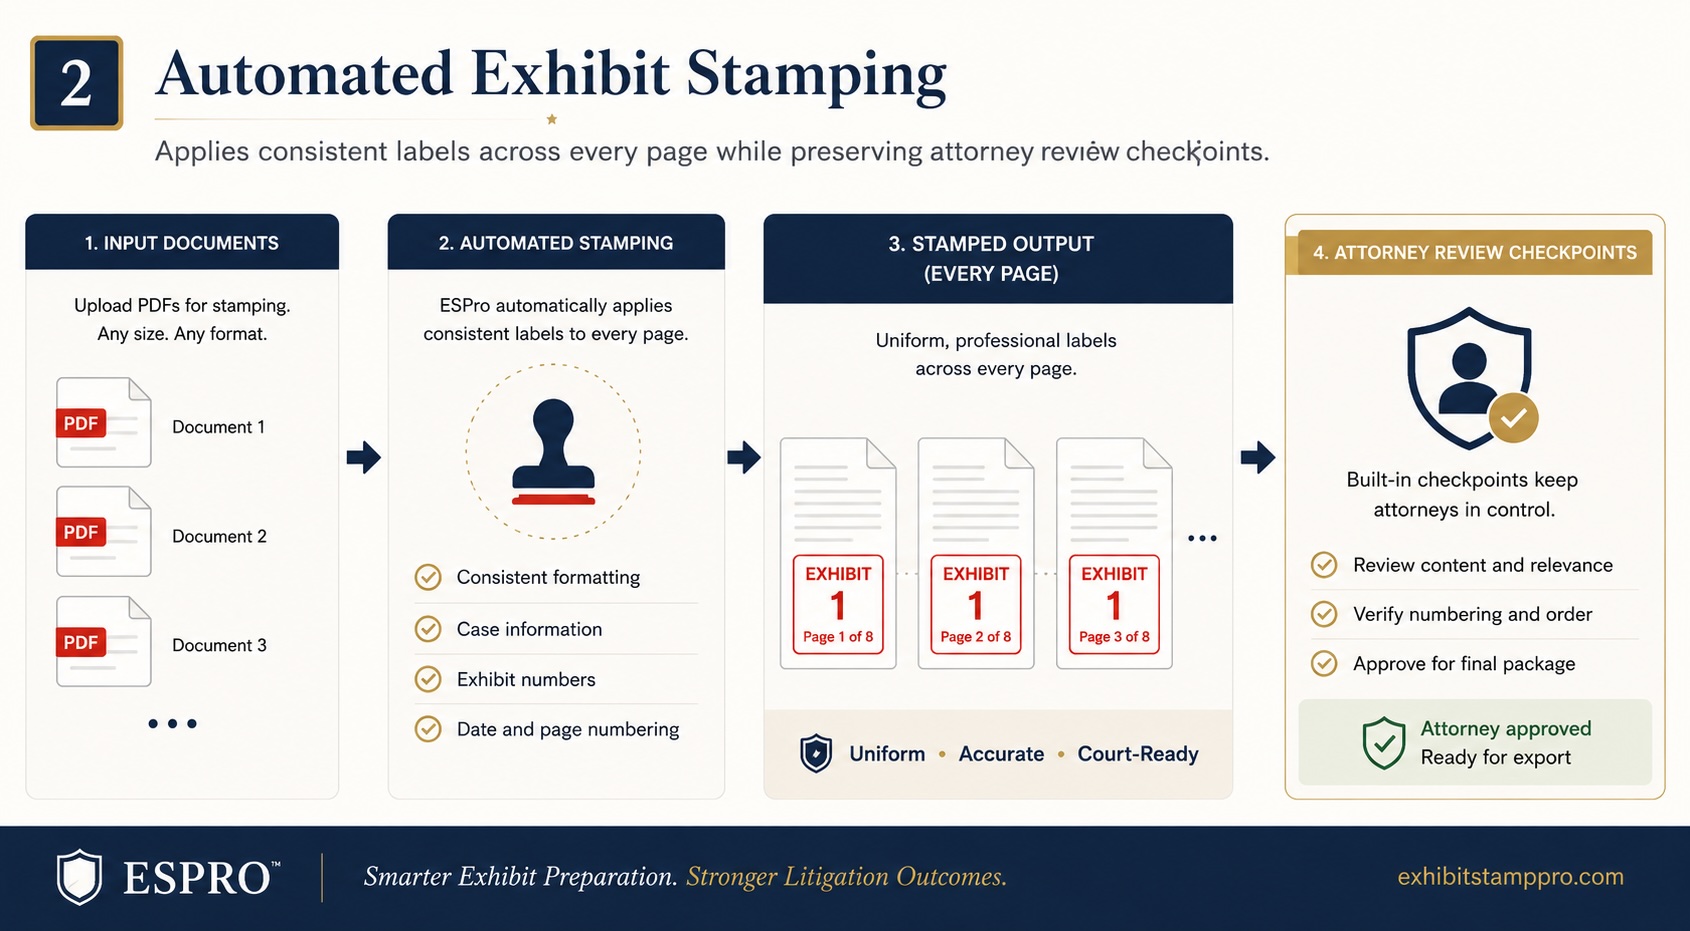
After numbering, exhibit labels are applied to each document.
Typical exhibit stamps include:
- Exhibit number
- Case name
- Date
- Confidential designation
- Trial identifier
Most firms still perform this process manually using PDF software. When handling hundreds of exhibits, manual stamping can require many hours and significantly increases the chance of human error.
Step 5 — Verify page order
Every PDF should be checked for:
- Correct page sequence
- Missing pages
- Blank pages
- Rotation problems
- Cropped scans
- Readability
Small formatting issues become much more noticeable once exhibits are presented in court.
Step 6 — Combine related documents
Many exhibits consist of multiple documents.
For example:
- Contract
- Amendments
- Email correspondence
- Attachments
These should usually be combined into a single exhibit while maintaining logical page order.
Step 7 — Create exhibit lists
Courts and attorneys frequently require an exhibit list.
A typical exhibit list includes:
| Exhibit | Description |
|---|---|
| Exhibit 1 | Employment Agreement |
| Exhibit 2 | Email dated May 14 |
| Exhibit 3 | Invoice #4582 |
Accurate descriptions help attorneys locate exhibits quickly during hearings.
Step 8 — Produce final PDF packages
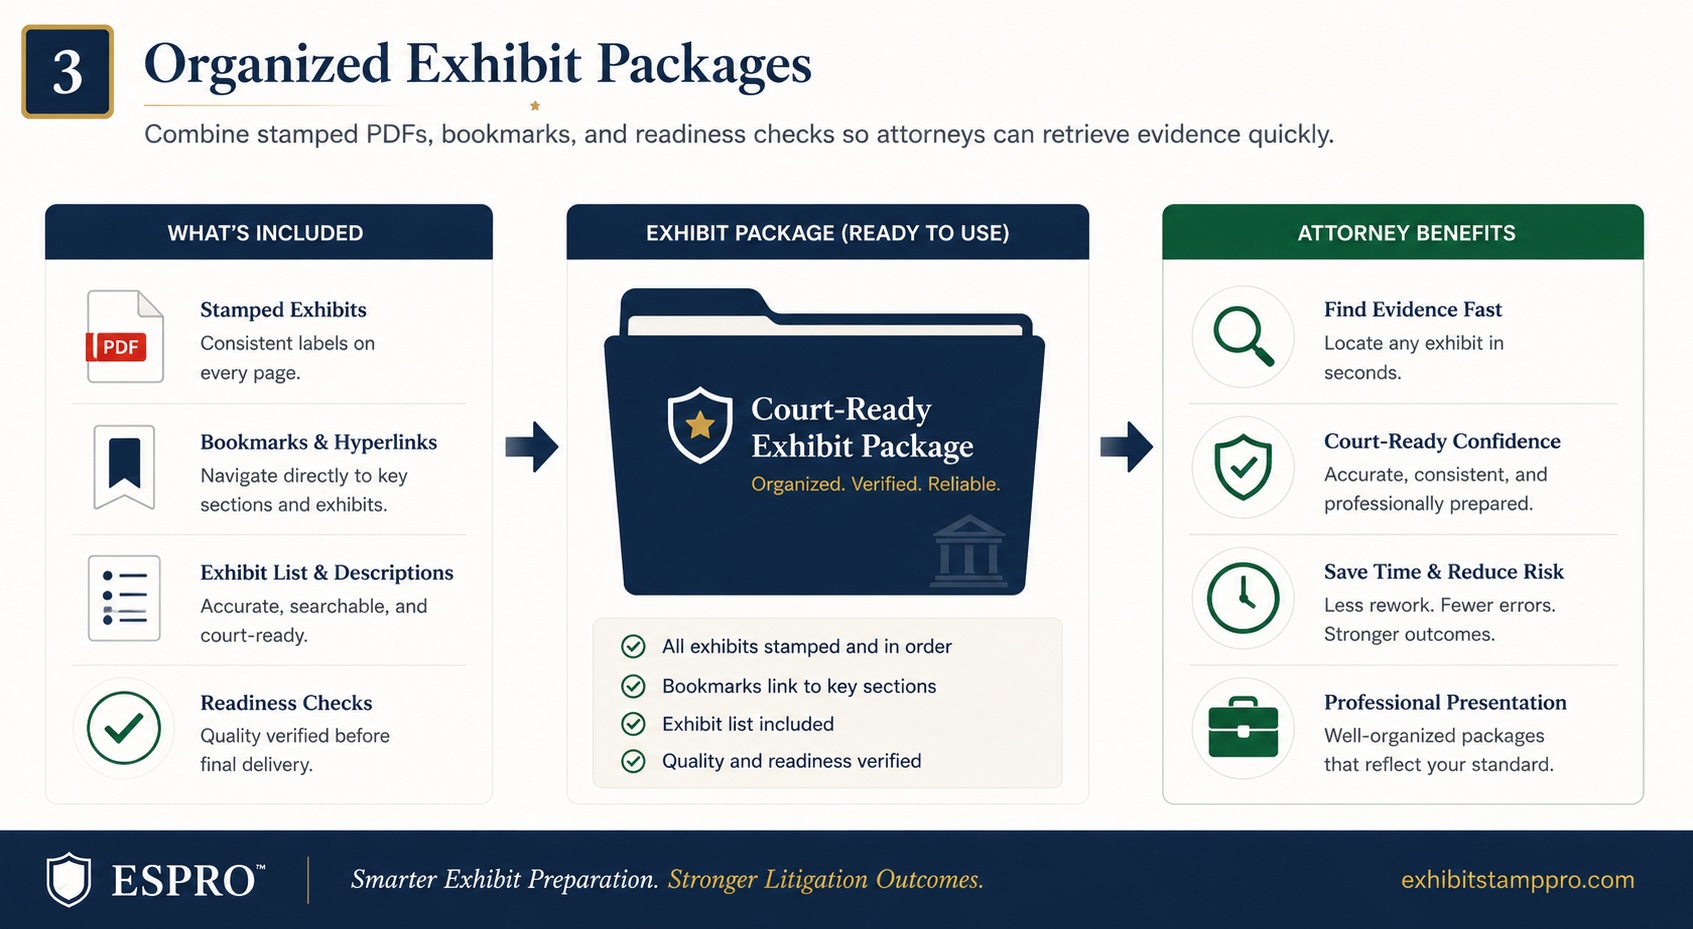
Before filing or trial, exhibits are commonly assembled into organized PDF packages.
These may include:
- Bookmarks
- Hyperlinks
- Table of contents
- OCR text
- Consistent filenames
The final package should allow attorneys to locate evidence in seconds. For deposition-specific packaging, see /resources/prepare-deposition-exhibits-efficiently.
Estimated time savings with automated workflows
Manual exhibit preparation scales linearly with volume. The table below shows typical manual preparation time by package size — automation can reduce most of these tasks to seconds or minutes.
| Package Size | Typical Manual Preparation Time* |
|---|---|
| 25 exhibits | 20–40 minutes |
| 100 exhibits | 1–2 hours |
| 500 exhibits | Several hours |
* Estimated preparation times based on common litigation workflows. Actual times vary depending on document quality, court requirements, and review procedures.
Compare workflow options in /resources/manual-stamping-vs-automation and /pdf-exhibit-stamping.
Common exhibit preparation mistakes
Even experienced litigation teams encounter recurring problems.
Duplicate exhibit numbers
Two different documents accidentally receive the same number.
Missing exhibits
A referenced exhibit never makes it into the final package.
Incorrect labels
The exhibit stamp displays the wrong number or case information.
Wrong page orientation
Scanned pages remain sideways or upside down.
Last-minute renumbering
Adding one exhibit near trial can require renumbering dozens — or even hundreds — of later exhibits if the workflow is manual.
For prevention tactics on each of these failure modes, see /resources/common-exhibit-preparation-mistakes.
Manual exhibit preparation vs. automated workflow
| Manual Process | Automated Workflow |
|---|---|
| Hours of repetitive clicking | Seconds for repetitive tasks |
| High risk of numbering errors | Consistent numbering |
| Manual PDF stamping | Automated stamping |
| Difficult to update | Easy to regenerate packages |
| Error-prone | Repeatable process |
Automation does not replace legal judgment — it reduces repetitive administrative work so litigation teams can focus on higher-value tasks.
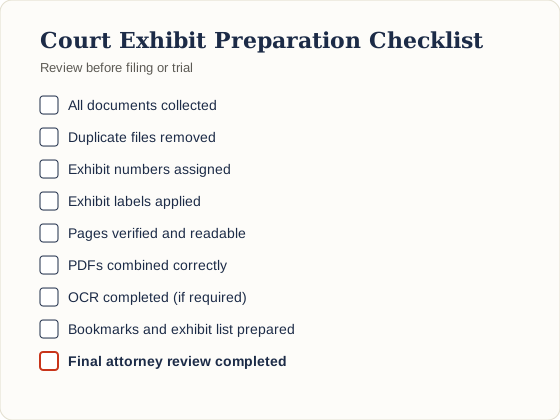
Court exhibit preparation checklist
Before filing or trial, confirm that every exhibit has been reviewed:
- All documents collected
- Duplicate files removed
- Exhibit numbers assigned
- Exhibit labels applied
- Pages verified
- PDFs combined correctly
- OCR completed (if required)
- Bookmarks added
- Exhibit list prepared
- Final attorney review completed
Related resources
Continue building your exhibit preparation workflow with these guides:
- Complete Guide to Legal Exhibit Preparation
- Exhibit Numbering Software
- PDF Exhibit Stamping
- Trial Exhibit Preparation
- Common Exhibit Preparation Mistakes
Final thoughts
Exhibit preparation remains one of the most detail-oriented responsibilities in litigation support. Whether preparing exhibits for depositions, hearings, or trial, careful organization and consistent workflows help reduce errors and improve efficiency.
As document volumes continue to grow, many litigation teams are exploring ways to automate repetitive steps while maintaining the accuracy required in legal practice.
If you are evaluating ways to streamline exhibit preparation, learn more about how ExhibitStampPro (ESPro) automates PDF exhibit stamping, exhibit numbering, and exhibit package creation for modern litigation teams.
Common questions
How are court exhibits numbered?
Numbering depends on local court rules, attorney preference, and whether exhibits belong to the plaintiff or defendant. Consistency throughout the case matters more than any single convention.
What software is used to prepare exhibits?
Many firms use general PDF editors, while others use specialized litigation software designed specifically for exhibit management, numbering, and package generation.
How long does exhibit preparation take?
A small exhibit package may take less than an hour. Large litigation matters involving hundreds of exhibits can require many hours or several days depending on volume, review depth, and formatting requirements.
Can exhibit preparation be automated?
Yes. Repetitive tasks such as PDF stamping, exhibit numbering, and package generation can be automated to reduce manual effort and improve consistency while legal review remains with counsel.